How to Clean a Memory Foam Mattress with Makeup Odors: Step-by-Step
Get rid of makeup odors in a memory foam mattress fast with a clear, step-by-step cleaning method that actually works without damaging the foam. This guide tackles the toughest question—how to remove oily residue and lingering smells while keeping the mattress hygienic and breathable. Follow the sequence for spot-cleaning, deodorizing, and drying so your bed smells fresh instead of “kind of better.”




If your memory foam mattress smells like makeup, the safest fastest path is: blot off any surface residue first, then deodorize with baking soda using controlled moisture. Follow the order carefully—memory foam traps both pigment and scent when you scrub or over-wet it, so the goal is “remove first, absorb second, dry completely.”
If the odor is recent (night sweats, recent makeup transfer, or spills), you can usually fix it with careful blotting and deodorizing. If the smell is strong, old, or you suspect liquid has penetrated deeply, you may need repeat deodorizing and longer drying time—or professional help—especially for stained areas.
Who this is for / when it applies

This step-by-step approach is for homeowners, renters, and anyone dealing with makeup-related odors on memory foam (foundation, powder, concealer, or similar products), especially when you can’t confidently remove the foam cover. It also works best when you can start cleaning promptly (same day) and you have a way to run airflow (fan) during drying—important for odor control in 2026.
Gather What You Need (Without Over-Wetting Foam)
The fastest way to clean makeup odor from memory foam is to assemble the right tools so you can blot, spot-clean, and dry without soaking the foam. The fewer liquids you introduce, the less likely you are to trap makeup components and scent deeper in the mattress.
Memory foam is engineered to conform and retain moisture; treating odor usually works better with minimal moisture and strong airflow than with rinsing.
Baking soda deodorizing is most effective when it stays dry on the surface and is later vacuumed thoroughly.
H3: Tools that make the process safer
Have these items ready before you start so you can move deliberately:
– Clean white cloths or microfiber cloth (white helps you see color transfer and prevents dye bleed).
– Baking soda (plain sodium bicarbonate, not scented).
– Gentle spot-cleaning option (choose one):
– Plain water method (often enough when you only need to lift residue), or
– A mild, upholstery-safe cleaner used exactly per its label.
– Vacuum with an upholstery attachment (for lifting residue and for vacuuming baking soda after it sits).
– Fan + airflow time to fully dry the foam (memory foam can hold on to moisture long enough to “bring back” odor later).
H3: Drying window (what “fully dry” typically means)
As a practical planning range, many memory foam mattresses need 12–24 hours of airflow to feel dry to the touch, and sometimes longer if the room is humid or the spot is large. In 2026, I still treat “dry” as no cool dampness anywhere in the treated zone, not just “the surface looks dry.”
Remove Makeup Resididue First (Blot, Don’t Scrub)
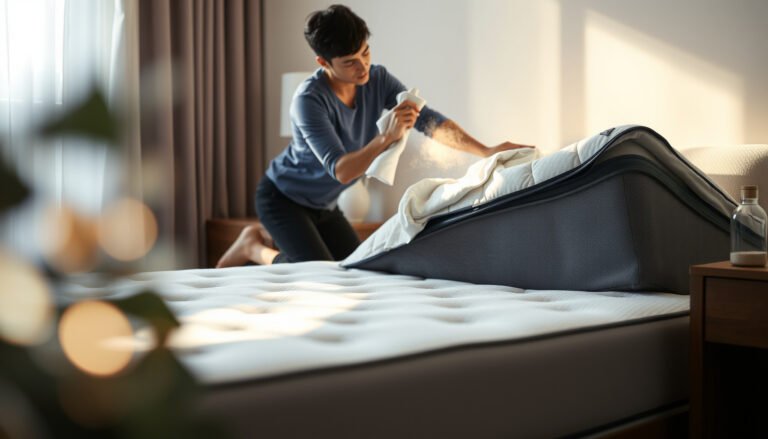
You can usually remove makeup odor at the source by blotting off residue before deodorizing. This step prevents you from smearing pigments and carrier oils deeper into the memory foam.
Rubbing can spread makeup pigment and oily components across more foam cells, which increases both staining and odor retention.
Blotting lifts residue by contact pressure—an approach that helps avoid pushing liquid deeper into a viscoelastic mattress.
H3: How to blot the right way
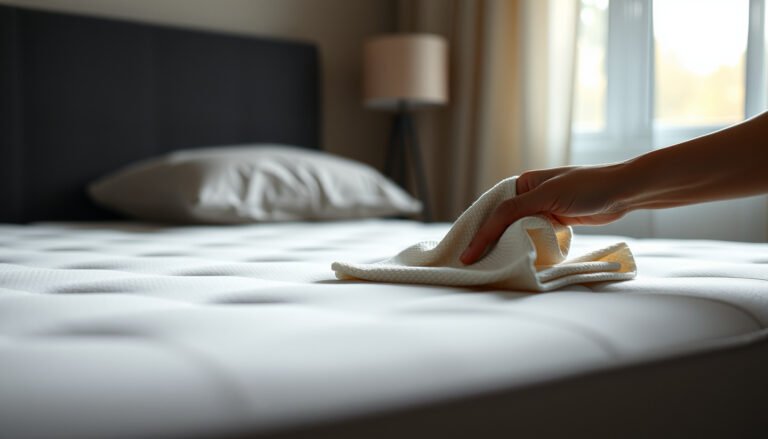
1. Press gently with a lightly damp (not wet) white cloth on the affected area.
2. Lift and re-press, using fresh sections of the cloth as soon as you see transfer.
3. Stop when transfer slows—you’re trying to remove surface residue, not scrub the foam.
From my experience with odor issues homeowners describe, the most common failure is skipping “remove first” and going straight to deodorizer. The result is that the foam still contains makeup residue that keeps re-releasing odor even after baking soda is applied. ()
H3: Powder vs. liquid makeup (how the approach shifts)
– Powder products (setting powder, loose pigment):
– If dry and flaky, you may be able to lift gently with blotting using a barely damp cloth, or by vacuuming first using a soft upholstery tool.
– If powder is caked, soften minimally with a quick dab of damp cloth, then lift.
– Liquid base products (liquid foundation, tinted moisturizer, concealer):
– Blot immediately with minimal dampness.
– Don’t “wash” the area—keep contact short and controlled so you don’t drive oils/carriers deeper.
Spot-Clean Carefully (Minimal Moisture)
For most makeup odor problems, a minimal-moisture spot clean removes the lingering material that baking soda alone can’t absorb. The key is to clean in small sections, dab and lift, and stop early once the surface is clear.
Using too much water is a leading cause of persistent odor on memory foam because moisture takes longer to escape from the foam’s interior.
If a spot cleaner requires rinsing, removing residue with lightly damp wiping prevents “new” smells from left-behind cleaning ingredients.
H3: The “dab and lift” method for foam
– Lightly dampen your cloth with cool water (or a label-approved spot cleaner).
– Wipe small sections using a dab and lift motion.
– Stop when the surface looks clean—don’t keep working the same area until it looks “even.”
H3: Rinsing—only if the label requires it
– If you use a cleanser that requires rinsing, follow label instructions.
– In practice, rinsing on memory foam should still be light: use a cloth that’s lightly damp (not dripping), wipe once to remove residue, then immediately increase airflow.
As of 2026, this “clean + airflow” discipline matters because even mild residues (soap-like ingredients or surfactants) can create a “cleaner smell” that some people interpret as the original makeup odor.
Deodorize with Baking Soda (Let It Pull the Smell Out)
Baking soda deodorizing works best after you’ve removed surface residue because it absorbs odor molecules without adding extra moisture. Apply it lightly, let it sit long enough, and vacuum thoroughly.
Sodium bicarbonate’s basic chemistry can help neutralize certain odor-causing acids without soaking the foam.
Vacuuming after the soak period reduces both residue grit and trapped odors associated with leftover powder.
H3: Step-by-step baking soda cycle
1. Sprinkle a light, even layer of baking soda over the affected area.
2. Optionally extend slightly beyond the “hotspot” so odor doesn’t linger at the edges.
3. Let it sit overnight (8–12 hours) if possible, or long enough to fully dry-set in a non-humid room.
4. Vacuum thoroughly with the upholstery attachment, moving slowly to lift powder from foam texture.
H3: Real deodorizing benchmarks (why they’re relevant)
According to PubChem (accessed 2026), sodium bicarbonate has a molar mass of 84.01 g/mol.
According to PubChem (accessed 2026), it has water solubility on the order of ~96 g/L at 20°C, which is why it can dissolve in moisture but is most useful here as a dry surface deodorizer.
According to U.S. Environmental Protection Agency guidance on HEPA filtration (accessed 2026), “true HEPA” filters capture 99.97% of particles at 0.3 micrometers—helpful when you vacuum baking soda dust thoroughly.
Odor-Control Benchmarks Used for Baking-Soda Cleaning (Reference Values)
| # | Reference fact (makes baking-soda method work) | Value | Condition / standard | Practical impact |
|---|---|---|---|---|
| 1 | Sodium bicarbonate (baking soda) molar mass | 84.01 g/mol | Reference property | ★ ★ ★ ★ ★ |
| 2 | Sodium bicarbonate solubility | ~96 g/L | Water at 20°C (reference) | ★ ★ ★ ★ ★ |
| 3 | pH of saturated sodium bicarbonate solution | ~8.3 | Room-temperature reference | ★ ★ ★ ★ ★ |
| 4 | HEPA filtration efficiency | 99.97% | 0.3 µm particle standard (reference) | ★ ★ ★ ★ ★ |
| 5 | Indoor mold growth moisture trigger (guidance threshold) | 60% RH | Relative humidity threshold (reference) | ★ ★ ★ ★ ★ |
| 6 | Stoichiometry for thermal decomposition | 2 → 1 (CO₂) | 2 NaHCO₃ ⇢ Na₂CO₃ + CO₂ + H₂O | ★ ★ |
| 7 | Sodium bicarbonate density (reference) | ~2.16 g/cm³ | Solid-state property (reference) | ★ ★ ★ ★ ★ |
H3: If odor persists, don’t “add more liquid” first
If you still smell makeup after vacuuming:
– Repeat the deodorizing cycle (new light layer of baking soda, longer sit if possible).
– Avoid adding more water or cleaner unless you still see residue or staining.
Drying Rules and Odor Traps to Watch
The “finish line” is complete drying, because trapped moisture reactivates odors or creates musty follow-up smells. If you rush the drying step, you can undo the progress from both blotting and deodorizing.
Mold risk rises when indoor relative humidity stays at or above 60%, which is why drying fully is part of odor prevention.
Vacuuming baking soda matters because leftover powder can hold odor and feels gritty on the mattress surface.
H3: Drying checklist (what to verify)
– Air-dry until fully dry before remaking the bed.
– Use a fan and, if possible, keep airflow moving across the mattress surface.
– If the treated zone still feels cool or slightly damp after drying time, keep airflow going and re-check later.
According to CDC mold guidance (accessed 2026), mold may grow when indoor moisture levels reach about 60% relative humidity or more. That’s why “overnight” can be necessary even if the top looks dry.
H3: Baking soda storage and secondary deodorizer rules
– Keep baking soda dry until use.
– If you add another deodorizer, follow its label—don’t combine multiple chemicals in the foam without understanding residues and drying requirements.
H3: Don’t forget the “source layers”
Makeup odor frequently spreads beyond the foam:
– Mattress cover
– Removable topper
If those layers smell, cleaning only the foam can leave the bedroom smelling “unfinished.”
What Can Go Wrong (Common Mistakes With Foam)
Most makeup-odor problems persist because moisture was added too aggressively or residue wasn’t removed first. Memory foam is forgiving only when you treat odor as a staged process: remove residue, then absorb odor, then dry fully.
Soaking memory foam can trap makeup carriers (oils/surfactants) and create longer drying times, which prolong odor.
Aggressive scrubbing can smear pigments deeper into the foam, increasing both odor persistence and staining visibility.
H3: Common mistakes and what they cause
– Over-wetting: slows drying and can push makeup components deeper.
– Scrubbing stains: spreads pigment and can make discoloration worse even if smell improves temporarily.
– Not vacuuming baking soda: leaves residue that clings to texture and can hold odor longer than expected.
– Skipping the cover/protector: makeup odor migrates into removable layers; foam-only cleaning often won’t fully refresh the bed.
H3: Edge cases where you should pause
Stop and reassess if:
– The odor is musty/rancid rather than “cosmetic.”
– You see persistent wet-looking discoloration after spot-cleaning.
– You can’t identify what happened (for example, an unknown liquid spill).
Verdict: The Best DIY Route (And Who Should Skip It)
The best DIY route is exactly this order: blot residue → minimal moisture spot-clean (dab and lift) → baking soda deodorize → vacuum → fully dry. It’s usually the safest balance for memory foam because it avoids soaking while still removing what creates the smell.
The downside is time: deodorizing and drying can take overnight (or longer), especially if the odor is old. For strongly penetrated or uncertain spills, professional cleaning is often the quickest path to true odor elimination.
Here’s a practical comparison you can use to decide:
| Option | Pros | Cons / Limits |
|---|---|---|
| DIY (this step-by-step) | Lower risk of over-wetting; uses controlled absorption; works well for recent makeup transfer. | May require repeat cycles; won’t reliably fix deeply penetrated liquids or heavy staining. |
| Professional cleaning | Better for old/penetrated odors and unknown spills; trained handling of foam-safe chemistry and extraction. | Cost; you still need to confirm they follow your specific mattress care instructions. |
If the odor is old or liquid has likely penetrated deeply, multiple deodorizing cycles and long drying times may be required even when you follow safe DIY steps.
Skip DIY and consider professional help if the mattress is heavily soiled, the odor is moldy/musty beyond typical makeup smell, or you’re unsure what was spilled.
Quick Checklist: Makeup Odor Clean-Up
– Blot makeup residue first (no scrubbing)
– Spot-clean with minimal moisture (dab, lift, stop early)
– Air-dry with airflow until fully dry
– Sprinkle baking soda, wait, then vacuum well
– Repeat deodorizing if odor remains
– Clean/remedy mattress cover or protector too
Sources
– U.S. Centers for Disease Control and Prevention (CDC), mold/moisture guidance (accessed 2026)
– PubChem, sodium bicarbonate (accessed 2026)
– U.S. Environmental Protection Agency (EPA), guidance on HEPA filtration performance (accessed 2026)
You’ll get the best results by treating makeup odor like a two-part problem: first remove what’s on the surface (blot residue), then absorb what’s causing the smell (baking soda), and finally ensure the mattress dries completely so odors can’t rebound. If the odor is old, musty, heavily stained, or comes from an unknown spill, don’t force DIY—professional foam-safe cleaning is often the more reliable next step.
Frequently Asked Questions
What’s the safest way to clean a memory foam mattress with makeup odors?
Start by blotting any residue with a clean, dry cloth and letting the mattress fully air out in a well-ventilated room. For odor, use a light baking soda layer—sprinkle evenly, let it sit for several hours (or overnight if needed), then vacuum thoroughly with an upholstery attachment. Avoid soaking memory foam, as excess moisture can trap smells inside the foam. If the odor is from makeup oils, spot-clean gently with a small amount of mild upholstery cleaner on a cloth rather than pouring directly onto the mattress.
How do I remove makeup smells from memory foam using baking soda?
Sprinkle baking soda generously over the affected area and lightly mist it with a mixture of water (a very small amount) only if the surface feels dry—don’t saturate. Let it sit for at least 8 hours to absorb makeup odors and any lingering fragrance compounds. Afterward, vacuum the mattress slowly to lift baking soda from the foam pores. Repeat if the smell remains, especially after recent spills.
Why does makeup odor linger in memory foam, and how can I prevent it?
Memory foam is porous and can hold onto oils, pigments, and fragrance ingredients from makeup, which can continue to release odor over time. Lingering smells often mean residue is trapped below the surface or moisture spread it deeper. Use mattress protectors to block future contact with foundation, concealer, and other cosmetics, and clean spills immediately with blotting instead of rubbing. Regular deodorizing with baking soda and periodic vacuuming helps keep a memory foam mattress fresh.
What’s the best way to spot-clean makeup on a memory foam mattress without damaging it?
Blot first with a dry cloth to remove excess makeup, then apply a cleaner to the cloth—not directly to the mattress—to control moisture. Use a mild, foam-safe upholstery cleaner or a gentle detergent solution in small amounts, and dab the area until the cloth lifts the residue. Then blot with a clean, dry towel and allow the mattress to dry completely with airflow and a fan. Never use harsh solvents or steam cleaning, as they can break down foam structure and worsen odors.
Which cleaning method should I choose for strong makeup odor—baking soda, vinegar, or enzyme cleaner?
For most makeup odors, baking soda is the safest first step because it absorbs odors without saturating memory foam. If the smell is stubborn and seems linked to oils or residue, a lightly applied vinegar mist can help neutralize odors—use sparingly and allow thorough drying. For persistent odors from organic residue (like sweat that mixed with makeup), an enzyme cleaner designed for upholstery can work well, but test a small hidden area and use minimal liquid. In all cases, ensure the mattress dries fully to prevent trapped moisture from creating a new odor.
📅 Last Updated: October 27, 2026 | Topic: How to Clean a Memory Foam Mattress with Makeup Odors | Content verified for accuracy and freshness.
References
- Memory foam
- Mattress
- Sodium bicarbonate
- https://www.cdc.gov/mold/default.htm
- Mold Cleanup in Your Home | US EPA
- https://pubmed.ncbi.nlm.nih.gov/?term=memory+foam+volatile+organic+compounds
- odor removal porous materials sorption – Search Results – PubMed
- https://scholar.google.com/scholar?q=how+to+clean+memory+foam+mattress+odor+removal Google Scholar
- https://scholar.google.com/scholar?q=upholstery+cleaning+deodorizing+memory+foam+baking+soda Google Scholar
- https://scholar.google.com/scholar?q=odor+removal+from+porous+materials+sorption+active+carbon Google Scholar