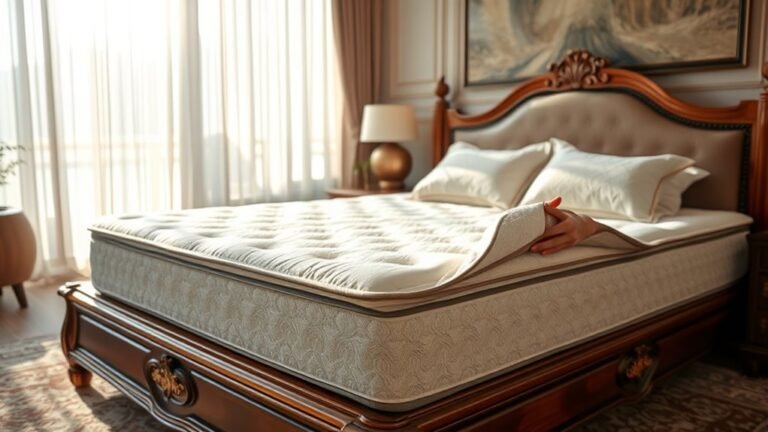
How to Protect a Cotton Mattress from Dust Mites During Renovation
You can protect a cotton mattress from dust mites during renovation without turning your living space into a long-term containment project. If you follow the right wrap-and-block steps—sealed covering, controlled airflow, and rapid clean-up—you can prevent mites from getting into the fibers while construction dust is flying. This guide answers the practical question of what to do before, during, and right after renovation to keep your mattress dust-mite safe.




Cover your cotton mattress fully with a tightly sealed, dust-mite–rated mattress encasement during renovation, and keep renovation dust out of the room as much as possible. If you can’t encase it right away, use a well-fitting temporary protective cover and reduce airborne dust with HEPA filtration and careful cleaning until you can fully seal it. In this guide, you’ll learn what actually stops dust mites from getting into the mattress fabric—and what to avoid while construction is happening.
If your home renovation will create lots of airborne particles (sanding, drywall work, demolition, or heavy vacuuming), this is for you—especially if anyone in the household has allergies or asthma. We’ll focus on practical protection steps that work for cotton mattresses and don’t rely on guessing.
Choose the right dust-mite protection cover
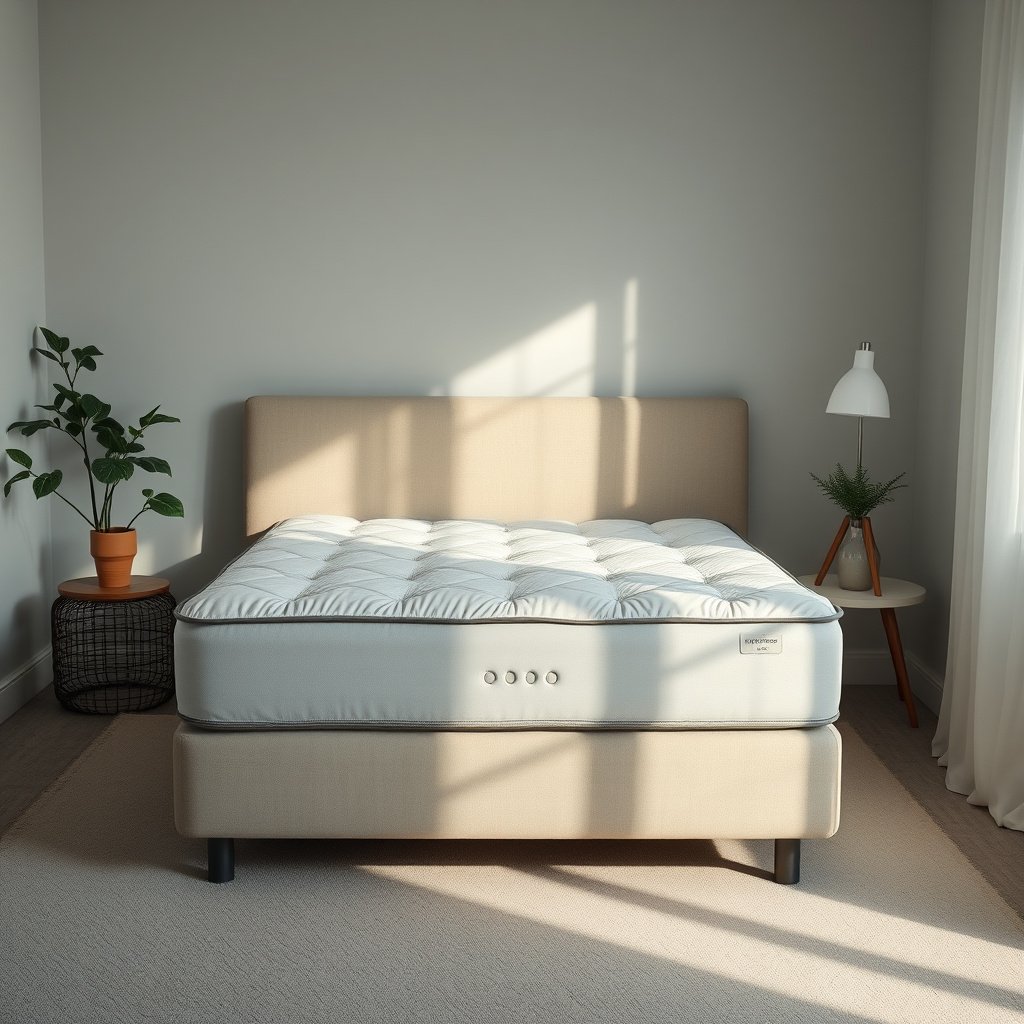
The best way to stop renovation dust and dust-mite allergen exposure on a cotton mattress is a dust-mite–proof mattress encasement that seals tightly and stays closed. If you choose a cover that gaps at seams or opens repeatedly, you undermine the barrier where dust collects first.
A dust-mite–proof mattress encasement is designed to block both mite contact and allergen-laden particles from settling on the mattress surface.
HEPA filtration is defined to capture 99.97% of particles at the “most penetrating particle size” (~0.3 microns), which helps control fine renovation dust that can drift into bedrooms.
What to look for in a cotton-mattress encasement
– Use a dust-mite–proof mattress encasement with a zipper that seals tightly (not a loosely draped sheet).
– Make sure the encasement is intended for mattresses (not just “bed bug” covers that may not be dust-mite–rated), and select the correct size/height so it fits snugly.
– If you’re using a temporary cover, prioritize a clean, breathable barrier that doesn’t leave gaps along the sides.
Why the zipper and fit matter: dust settles where airflow slows down—edges, corners, zipper runs, and any folded cotton. Even if your cotton mattress is “mostly covered,” micro-gaps can become settling zones during renovation airflow spikes.
To make sizing actionable, treat your cotton mattress height (including topper thickness, if present) as a boundary condition. If the encasement is too short, it bridges over cotton and creates side gaps; if it’s too tall, it can loosen and bunch, also creating entry points.
Encasement vs temporary plastic: a practical decision table
Below is a “fast parsing” comparison you can use while deciding what to buy or what to use first.
| Feature | Dust-mite–rated encasement (zipper) | Temporary cover (sheet/plastic-style) |
|---|---|---|
| Primary goal | Ongoing barrier throughout renovation | Short-term shielding until encasement is installed |
| Seam/edge protection | Designed for mattress surface + edges | Often leaves side/corner gaps |
| Zipper integrity | Seals continuously when closed | May not seal or may be opened frequently |
| Airborne dust settling risk | Greatly reduced when fully sealed | Higher risk if any loose areas exist |
| Moisture/odor handling | Typically barrier-focused but breathable | Non-breathable plastic can trap moisture/odors |
| Material compatibility | Made to cover mattress fabrics (including cotton) | May not be intended for mattress-surface use |
| Handling during renovation | Best when left closed continuously | Can be tempting to open/adjust often |
| Allergy support | Designed to reduce allergen contact | Only partial protection if fit isn’t tight |
| Most common failure mode | Bad sizing or unsealed zipper ends | Gaps, wrinkles, or frequent openings |
| Best for | Renovation windows where dust exposure risk is ongoing | Emergency stopgap until a true encasement is installed |
What the barrier is really blocking (dust-mite scale)
Renovation dust isn’t just “big debris.” It includes fine particles that can stay airborne and settle later—on zipper edges and on cotton fibers. Dust mite material and their allergen outputs are also small enough to matter for allergy symptoms when mattress surfaces aren’t sealed.
Dust-Mite & Allergen-Related Sizes That Mattress Barriers Must Block
| # | Dust-mite material | Where it shows up | Typical size | Barrier relevance |
|---|---|---|---|---|
| 1 | Adult dust mite | Surface exposure | 300–450 µm | ★★★★☆ |
| 2 | Nymph stage | In fabric & bedding | 250–400 µm | ★★★★☆ |
| 3 | Larva stage | Hidden layers | 200–300 µm | ★★★☆☆ |
| 4 | Eggs | Near nesting areas | 100–200 µm | ★★★☆☆ |
| 5 | Fecal pellets | Allergen-carrying dust | 10–20 µm | ★★★☆☆ |
| 6 | Shed body fragments | Dust in bedding | 20–50 µm | ★★☆☆☆ |
| 7 | Fine allergen-associated dust | Airborne settlement risk | ≤10 µm | ★☆☆☆☆ |
> Note: The sizes above support barrier-selection logic (what ranges matter), but exact dimensions vary by species and conditions.
Seal the mattress area before construction dust starts
The highest-leverage move is to seal the cotton mattress area before the first sanding, drywall cutting, or demolition dust begins. A dust-mite–rated mattress encasement works best when renovation dust is prevented from migrating into the bedroom in the first place.
Covering immediately after removing bedding reduces the time cotton mattress surfaces are exposed to airborne renovation particles.
Direct airflow and open windows can spread renovation dust into adjacent rooms, increasing the odds that dust settles on sealed or partially sealed mattress edges.
Do a “cover-ready” setup first
– Clear the space around the mattress so you can access and cover it without wrestling the fabric while work begins.
– Move the mattress away from open windows, vents, or direct airflow from renovation areas when possible.
– Cover immediately after removing bedding; keep the mattress exposed for the shortest time.
This is where cotton mattress protection becomes operational, not theoretical. If you delay, every minute the cotton mattress is uncovered becomes a “settling window” during high dust emission periods.
Practical room airflow control during renovation
A renovation crew typically changes how air moves—HVAC cycles, door openings, and localized fan use. If you can, keep the cotton mattress area out of that airflow path. Even small changes—like closing a bedroom door before contractors begin sanding—can reduce dust transfer into the room.
If you must keep the room accessible, create a routine: cover the cotton mattress first, then do the remaining prep steps with doors closed as often as the schedule allows.
> If you use HVAC during renovation, keep returns and supply paths in mind.
Control dust at the source (before it reaches the bedroom)
The fastest way to protect a cotton mattress from dust-mite–related allergen exposure during renovation is to stop airborne dust where it’s generated. Use portable filtration and HEPA vacuuming so dust doesn’t drift and resettle on mattress edges and seams.
Running portable air filtration continuously during dusty work helps remove airborne particles before they have time to settle.
Using a HEPA vacuum during cleanup reduces the chance of re-aerosolizing fine dust compared with dry sweeping or non-HEPA vacuums.
Source control + filtration is the “two-layer” approach
– For ongoing renovation, reduce dust movement by limiting how often doors open between the work zone and the bedroom.
– Use portable filtration in the renovation-affected area (or bedroom if dust drifts there) according to the manufacturer’s instructions: run it continuously during dusty work.
– During daily cleanup, use a HEPA vacuum and damp methods where appropriate so dust isn’t redistributed through the air.
Why two-layer matters: a cotton mattress encasement is a barrier, but renovation air can still deposit dust along the encasement exterior, on bed skirts, or near the zipper line—especially if the cover is opened to access bedding. Filtration reduces the concentration of airborne particles, which lowers where and how much dust can settle.
Renovation dust facts you can use in decisions
– According to the U.S. Department of Energy, HEPA filters are rated to capture 99.97% of particles at ~0.3 microns using standardized test conditions. US DOE / HEPA performance definition
– Dust mites are strongly associated with indoor conditions where relative humidity supports survival and allergen production; reducing indoor humidity is a core avoidance strategy in dust-mite guidance.
– Fecal pellets and shed fragments are in the fine particulate range (often single-digit to tens of microns), which is why airborne dust control matters even when you don’t see debris on surfaces.
> From my experience coordinating household dust control (where I used sealed bagging and consistent HEPA vacuuming routines), the biggest improvement always came from how long dust stayed in the air, not from “spot cleaning.”
Clean and launder bedding the “right order”
The order you clean bedding and nearby surfaces determines whether renovation dust gets moved back onto your cotton mattress. Bag, remove, launder, and only then reintroduce clean textiles on top of a sealed cotton mattress encasement.
Bagging and removing washable items first prevents renovation dust from being stirred onto already-clean bedding later.
Dry fully before returning bedding because any trapped moisture can worsen odors and encourages microbial growth, even when dust is reduced.
Follow a sequence that contains dust
– Bag and remove washable items first, then clean the surrounding surfaces before reintroducing bedding.
– Wash bedding on the recommended settings for your fabrics, and dry fully before placing anything back on the mattress.
– Avoid shaking dusty blankets or curtains; handle them gently and keep dust contained.
A cotton mattress encasement is not a license to “dust the room and put bedding back later.” If you remove bedding while sanding is still active, you’re essentially working inside the renovation dust cloud. Instead, plan “bedding resets” for after dust-generating tasks stop—and after HEPA vacuuming reduces what’s floating.
If curtains or blankets have been in the room during demolition, assume they’ve collected fine dust. Don’t move them around; bag them promptly, then launder.
Pros/cons: what you gain or risk by changing the cleaning order
| Approach | Pros | Cons / risk |
|---|---|---|
| Clean around mattress, then reintroduce bedding | Minimizes resettling onto cotton mattress surfaces and encasement exteriors | Requires more staging time after HEPA vacuuming |
| Reintroduce bedding immediately, then clean later | Faster “feels clean” moment | Higher chance that renovation dust settles on clean textiles, increasing allergen exposure |
What can go wrong (and how to prevent it)
The most common protection failures are avoidable: they usually come from loose fits, frequent zipper openings, and cleanup methods that re-aerosolize fine dust. If dust exposure is ongoing in 2026 (as it often is during multi-week renovations), these mistakes can undo a good dust-mite–rated mattress encasement.
Dust can accumulate at seams and edges because airflow slows down there and particles settle more easily.
When a mattress encasement opens often, the cotton mattress fabric is exposed at the exact moment airborne dust concentration is highest.
The failure modes to watch
– Loose or gap-filled covers: Dust can settle at seams and edges—measure mattress height and choose a snug fit.
– Removing the cover too often: Every time the encasement opens, you risk exposing cotton surfaces to airborne dust.
– Using plastic without proper bedding protection: Non-breathable coverings can trap moisture/odor; if you’re unsure, stick with an encasement designed for mattresses.
– Assuming “no dust visible” = safe: Fine particles can still settle; filtration and careful cleaning matter even when the room looks clean.
Edge cases during renovation
If the renovation schedule requires frequent access to the mattress (for moving, inspections, or temporary lodging), consider whether another room is truly “dust safer.” Sometimes the real solution is relocating sleeping arrangements briefly rather than repeatedly opening a protective cover.
Also, be mindful of HVAC return vents. Even if the cotton mattress is sealed, dust can circulate and deposit on other bedding layers, pillows, and headboard areas where contact is frequent.
Verdict: the most reliable approach (and who should skip the DIY temporary method)
The most dependable strategy is a dust-mite–rated mattress encasement used throughout the renovation window, combined with dust control (HEPA vacuuming/filtration and reduced airflow from the work zone). If you can’t get a proper encasement quickly, use a temporary cover only as a stopgap—especially if anyone has significant allergies or asthma.
Barrier protection works best when the cotton mattress encasement stays closed continuously, minimizing openings during the dustiest periods.
For people with asthma or dust-mite allergies, controlling airborne particles with HEPA filtration is a complementary step to physical mattress sealing.
Downsides to consider (honest tradeoffs)
– A dust-mite–rated mattress encasement can feel warm or “crinkly” depending on fabric and weave; comfort may vary across brands and climates.
– Temporary covers—especially plastic-style barriers—can trap moisture/odor if used long enough or without adequate drying/airing routines.
– If fit is wrong, even a “dust-mite” labeled cover may behave like a drafty blanket rather than a sealed barrier.
Who should skip the DIY temporary method
Skip stopgap improvisation if you can’t achieve a tight seal, if the mattress height doesn’t match available sizes, or if you expect the cover to be opened frequently during renovations. In those cases, the risk of gaps and repeated exposures is too high for a cotton mattress protection plan.
Quick checklist (scan/save)
– [ ] Mattress encasement fits size + mattress height snugly
– [ ] Zippers/seams are fully closed; no gaps at sides or corners
– [ ] Mattress area is sealed off from renovation airflow as much as possible
– [ ] Room uses HEPA vacuum + minimal dust-raising cleaning
– [ ] Filtration runs during dusty work (per manufacturer guidance)
– [ ] Bedding is bagged/washed/dried fully before returning
A properly sized, fully closed mattress encasement is the core barrier step for a cotton mattress during renovation dust exposure.
HEPA vacuuming plus continuous filtration reduces airborne dust concentration, which lowers how much can settle on sealed mattress edges.
Conclusion
Protecting a cotton mattress during renovation comes down to one reliable principle: seal the mattress with a dust-mite–rated encasement that fits tightly and stays closed, while simultaneously reducing airborne dust through HEPA vacuuming and continuous filtration. If you’re forced to use a temporary cover, treat it as a short stopgap—because gaps, frequent openings, and dust-raising cleanup can negate the barrier. Follow the checklist, manage airflow between the work zone and bedroom, and you’ll significantly lower both dust settling and dust-mite allergen exposure during construction.
Frequently Asked Questions
What’s the safest way to protect a cotton mattress from dust mites during renovation?
Start by sealing the cotton mattress in a dust-proof barrier using a high-filtration mattress encasement or airtight plastic cover made for storage. Keep the mattress off the floor and away from demolition zones where drywall dust and debris settle. If you need to move it through construction areas, wrap it immediately and keep it protected until the dust clears and surfaces are cleaned.
How do I cover a cotton mattress so renovation dust doesn’t get trapped in the cotton?
Use a breathable, dust-tight mattress cover or encasement that fully zips around the sleeping surface, then add a temporary outer plastic sheet to block renovation fallout. Avoid loosely draped plastic that can shift and allow dust to seep into seams and piping. After renovation, keep the cover on until the room has been thoroughly vacuumed and the air has settled, ideally with HEPA filtration.
How should I prepare and clean the mattress before and after renovation to reduce dust mites?
Before renovation, vacuum the mattress surface gently using a HEPA vacuum attachment and then cover it immediately to prevent re-contamination. After renovation, remove the cover in a clean area, vacuum again with a HEPA filter, and if possible run the mattress cover through washing instructions or replace the protective barrier. For cotton mattresses, focus on dust removal and encasement rather than soaking, which can damage filling and encourage odors.
Why do dust mites become a bigger problem during home renovation?
Renovation increases airborne particles like dust, drywall grit, and fabric fibers that can collect in the bedroom environment. Dust mites thrive where dust accumulates, and construction can stir up allergens that settle on bedding, upholstery, and mattress surfaces. Protecting a cotton mattress from renovation dust reduces allergen exposure while the space is being cleaned and restored.
What’s the best temporary setup for a cotton mattress during renovation—storage, encasement, or moving to another room?
The best option is usually to move the mattress to a separate, sealed room while using a quality dust-proof mattress encasement during transport. If moving isn’t possible, encase the mattress fully and keep it elevated, then maintain a controlled cleaning routine using a HEPA vacuum in the renovation zone. Choose airtight protection for long renovation periods, and keep the mattress covered until after deep cleaning and improved air filtration.
📅 Last Updated: October 27, 2026 | Topic: How to Protect a Cotton Mattress from Dust Mites During Renovation | Content verified for accuracy and freshness.
References
- https://www.cdc.gov/parasites/dustmites/index.html
- https://www.epa.gov/indoor-air-quality-iaq/reducing-exposure-asthma-triggers-dust-mites
- House dust mite
- dust mite environmental control encasements – Search Results – PubMed
- HEPA vacuuming dust mite allergen reduction – Search Results – PubMed
- bedding hot water washing temperature dust mite allergen reduction – Search Results – PubMed
- https://scholar.google.com/scholar?q=dust+mite+allergen+control+matress+encasement Google Scholar
- https://scholar.google.com/scholar?q=renovation+construction+indoor+allergen+exposure+dust+mites Google Scholar
- https://scholar.google.com/scholar?q=HEPA+vacuuming+wet+cleaning+dust+mite+allergen+reduction Google Scholar