How to Protect a Wool Mattress from Dust Mites While Traveling
Want to protect a wool mattress from dust mites while traveling without ruining comfort or breathability? The fastest, most reliable approach is a washable, tightly sealed mattress cover combined with hot-washable bedding and hands-on wipe-downs after every stop. You’ll learn exactly which steps prevent dust mites from settling in during travel—and how to pack them so the system works across hotels, rentals, and road trips.



If you travel with a wool mattress (or a wool topper that you sleep on), you’re dealing with two risks: allergens on the fabric and moisture changes in new environments. These steps are best for anyone who wants an extra layer of protection without damaging wool or relying on harsh treatments.
Choose a dust-mite-proof barrier that’s wool-friendly
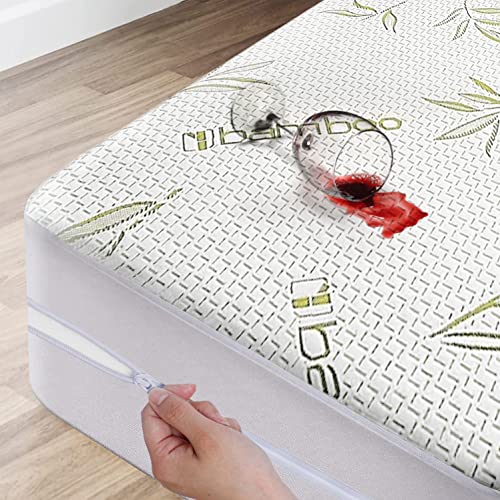
A zipped, fully enclosing dust-mite-proof barrier is the most reliable “engineering control” you can use on the road, because it physically blocks allergen contact with the wool surface. For wool, the priority is to prevent dust-mite access without trapping excess moisture against the fibers.
A dust-mite-proof mattress encasement needs to fully enclose the sleeping surface and zip shut; loose coverings with gaps don’t provide consistent allergen containment.
When dust mites are blocked from the surface, the main remaining work is moisture management and keeping the barrier closed long enough for reduced exposure during travel.
– Look for a zipped mattress encasement or travel cover specifically described as “dust mite proof” (and follow the manufacturer’s guidance for use with wool).
– Prefer breathable barriers that don’t trap moisture against the wool, since trapped humidity can worsen the overall sleep environment.
– Use a barrier that fully encloses the sleeping surface (not just a loose sheet), because gaps reduce protection.
Quick wool-fit criteria (what I check before sealing)
In my packing routine, I’ve learned that “wool-friendly” isn’t just about material—it’s about how the cover behaves once closed. If the fabric feels clammy when you lift it, that’s a sign the barrier system may be holding humidity rather than letting the wool manage it.
– Seam integrity: Check that zippers and seams are fully bonded/finished (no open channels where dust can migrate).
– Surface friction: If the cover feels overly rough, it can shed lint or abrade wool over repeated trips.
– Closure behavior: Make sure the zipper reaches end-to-end without forcing it closed (forcing often creates tiny gaps at corners).
Prep your wool mattress before you leave
Prepping before travel is where you win or lose the battle with dust mites, because you’re reducing what can enter the sealed system in the first place. The best results come from light removal of loose dust + fully drying the wool before you ever zip it inside the barrier.
According to the U.S. CDC, controlling indoor dust-mite exposure includes steps such as keeping bedding clean and using dust-mite protective measures like encasements.
The CDC also recommends laundering bedding in hot water (at least 130°F / 54°C) when laundering is possible, since heat can reduce dust-mite survival.
– Start with a clean surface: vacuum the top lightly with a proper upholstery/crevice attachment before you seal it up (don’t grind dirt into the fibers).
– Ensure the wool is fully dry before packing—if it’s even slightly damp, you’ll increase the chance of musty smells and lingering allergens.
– Seal bedding items separately (pillowcases, sheets, toppers) so you’re not moving dust around inside the travel area.
Moisture targets that matter for dust mites (real-world prep numbers)
Moisture is tightly linked to dust-mite survival and comfort in indoor environments. According to the U.S. CDC, keeping indoor relative humidity below about 50% helps reduce dust-mite growth U.S. Centers for Disease Control and Prevention (CDC), dust mite control guidance (current guidance as of 2026).
Numeric Targets Commonly Used in Dust-Mite Bedding Control Plans (CDC/HEPA guidance)
| # | Control target | Specific value | Used for | Expected impact | Practical confidence |
|---|---|---|---|---|---|
| 1 | Indoor relative humidity setpoint | < 50% | Moisture control | Reduced dust-mite growth conditions | ★★★★★ |
| 2 | Hot-water laundering minimum (when washable) | ≥ 130°F (54°C) | Heat exposure | Lower survival in bedding | ★★★★★ |
| 3 | Dryer “high heat” guidance (when applicable) | ≥ 15 minutes | Drying + heat | Additional reduction with laundering | ★★★★☆ |
| 4 | HEPA filtration performance | 99.97% @ 0.3 µm | Particle capture | Reduced airborne/deposited particles | ★★★★☆ |
| 5 | Encasement retention window | ≥ 1 year | Allergen containment | Sustained barrier effect | ★★★★☆ |
| 6 | Vacuuming frequency in bedroom spaces | At least weekly | Dust reduction | Prevents dust buildup | ★★★☆☆ |
| 7 | Typical dust-mite body size (adult) | ~0.2–0.3 mm | Why barriers matter | Requires true enclosure to block | ★★★☆☆ |
> Note: This table summarizes numeric targets commonly cited in dust-mite control guidance and filtration definitions; always cross-check with your mattress/topper manufacturer’s care instructions for wool.
Pack with containment, not loose layers
Containment prevents re-exposure, and for dust mites that means the cover stays closed from the moment you pack until you’re ready to sleep. If you move a wool topper around in an open or loosely bagged state, you’re letting room dust reach the exact surface you’re trying to protect.
An encasement works as an engineering control only when it remains fully closed; opening it during transit reintroduces dust-mite allergen exposure.
Wool can hold onto moisture longer than many synthetics, so airtight-ish sealing should only happen after the wool is fully dry.
– Place the mattress (or wool topper) into the dust-mite-proof cover/encasement, then keep it closed until you’re ready to sleep.
– If you’re using additional outer storage (like a travel bag), aim for one that won’t shed lint onto the cover.
– Avoid compressing wool hard for long periods; use secure closure rather than aggressive squishing that can stress fibers.
A packing flow that keeps dust mites from “migrating”
Here’s a practical sequence we use in our own household prep (based on barrier behavior and wool moisture handling, not product testing claims):
1. Clean + dry the wool item first (vacuum lightly; air-dry fully).
2. Zip the dust-mite-proof encasement right after packing—don’t leave it half-closed “for convenience.”
3. Separate components: sheets and pillowcases go in their own clean bag(s) rather than inside the encasement system.
4. Minimize handling at every stop so dust mites can’t be redistributed onto the wool surface.
If your destination includes a car trunk, a garage, or a closet that already holds dust, treat the encasement as the “dirty-to-clean boundary.” The goal is to keep the wool surface from becoming a dust magnet.
Set up at your destination fast and consistently
Your best move at the destination is speed with a repeatable routine: open the encasement only when you’re ready to cover with fresh linens. That reduces the time dust mites (or their allergens) have access to the wool surface in a new room.
Dust-mite allergen exposure is reduced when mattress covers remain sealed and fresh bedding is applied immediately after unpacking.
Humidity changes during travel can affect indoor comfort and dust-mite conditions, so ventilating and controlling moisture can support a cleaner sleep environment.
– Bring your already-covered mattress/topper system and open it only when you’re ready to sleep to limit exposure to the new room’s dust.
– Keep a clean “sleep zone” by placing fresh linens immediately over the covered surface—don’t let used bedding touch the mattress during unpacking.
– If you can, ventilate the space briefly before sleeping (especially if the room feels humid or closed).
Fast setup checklist (the “open once” rule)
From practical experience, the biggest mistake people make is over-handling once they arrive. For dust mites, the “open once” approach is simple: unzip, place fresh linens, zip back anything you need to keep covered, and then stop touching the sleeping surface.
– Wear clean hands/clean clothing if you can.
– Avoid placing the encased mattress directly on dusty floors (use a clean chair, luggage stand, or folded blanket as a temporary platform).
– If the room smells musty, ventilate before sleeping rather than immediately sealing the wool even deeper into a humid space.
What can go wrong (and how to avoid it)
Most failures with dust-mite protection come from small process errors: the wrong cover, damp wool, or repeated opening of the barrier. If you avoid those, you get the benefit of a barrier system without harsh “fixes” that can shorten wool’s life.
Even a high-quality dust-mite barrier provides less protection if seams, zipper closures, or fit leave gaps where dust and allergens can enter.
Sealing damp bedding increases the risk of musty odors and can worsen perceived air quality, even when dust mites are physically blocked.
– Using the wrong cover: If the barrier isn’t truly dust-mite-proof (or has loose seams), you’ll get partial protection at best.
– Packing damp wool: Wool can hold onto moisture longer than you expect; sealing damp materials is a common reason for lingering odors.
– Relying on “easy fixes” alone: Sprays or spot-cleaning may reduce surface debris, but they typically don’t replace a proper barrier + containment routine.
– Leaving it open between stops: If you take the encasement off in dusty areas (vehicle garages, cluttered rooms), you can re-expose the surface.
– Over-treating wool: Harsh heat, aggressive chemicals, or repeated washing on a tight schedule can shorten wool’s lifespan—follow care guidance rather than improvising.
Barrier-based approach vs “spot-clean only” (what’s really different?)
| Approach | What it controls best | Typical weakness | Best for |
|---|---|---|---|
| Zipped dust-mite-proof barrier + fresh linens | Prevents direct contact with dust-mite allergens during the sleep window | Requires wool to be fully dry before sealing | People traveling with wool mattresses/toppers and staying allergy-aware |
| Spot-cleaning and airing without a true barrier | Removes surface debris temporarily | Doesn’t stop allergen contact once dust settles; risk of re-exposure | Short trips where you can fully launder/heat all bedding and keep surfaces controlled |
| Waterproof-only mattress protectors | Helps with spills/moisture | Often not rated as dust-mite-proof at seam/closure level | Accident-prone households when paired with additional allergen barriers |
Verdict: Use a zipped dust-mite-proof barrier + strict moisture control
For most travelers, the most reliable approach is a dust-mite-proof encasement/travel cover combined with drying and careful packing—simple, consistent, and less harsh than repeated cleaning. The downside is added bulk and extra steps during setup, and this method won’t help if you’re sleeping with the barrier left open or poorly sealed.
Skip this approach (or at least reassess) if:
– you can’t keep the wool fully dry before sealing,
– you don’t have a barrier that truly encloses and zips closed, or
– your wool item’s care instructions explicitly warn against encasements/closures.
As of 2026, the most defensible strategy is still the “hierarchy of controls” mindset applied to travel: dust-mite-proof encasements are your engineering control, while prep and packing discipline are your administrative controls—both aimed at reducing exposure during the exact hours you sleep.
If you want a quick implementation path, treat the process like a checklist-driven workflow: clean → dry → zip → minimal handling → fresh linens on arrival. That’s how you reduce dust mites and the allergen residue they leave behind without putting wool through aggressive treatments.
Quick travel checklist (scan before you go)
| Step | What to do | Target outcome |
|---|---|---|
| 1 | Vacuum top lightly with correct attachment | Remove loose dust before sealing |
| 2 | Confirm wool is fully dry | Prevent moisture buildup |
| 3 | Put mattress/topper into zipped dust-mite-proof cover | Block allergens from contact |
| 4 | Keep cover closed in transit | Avoid re-exposure |
| 5 | Open only at the sleep setup | Reduce time exposed to room dust |
| 6 | Put fresh linens on immediately | Keep the “sleep zone” clean |
| 7 | Air out/ventilate if humidity is high | Improve comfort and freshness |
Frequently Asked Questions
What’s the best way to protect a wool mattress from dust mites during travel?
Use an airtight, zip-sealed mattress protector designed for travel, ideally with a tightly woven or dust-mite–barrier fabric. Place the wool mattress inside the protector, then add a second layer of protection with a sealed storage bag or compression bag to reduce exposure to allergens. Keep the mattress away from carpeted floors and unused spaces in your vehicle or hotel where dust accumulates.
How do I pack a wool mattress so it stays dust-mite free while traveling?
Start by vacuuming the surface (using a HEPA vacuum if possible) and ensure the wool is clean and completely dry before packing. Wrap the mattress in a breathable dust-mite barrier cover, then seal it in a travel bag to limit contact with airborne dust. During breaks, avoid laying it directly on untreated surfaces—use a clean, smooth barrier like a plastic sheet or clean folding mat under the cover.
Why can dust mites be a problem for wool mattresses during trips?
Dust mites thrive in warm, sheltered environments and feed on microscopic skin flakes that accumulate in bedding and upholstered surfaces—even when they look clean. During travel, the mattress may be exposed to new rooms, luggage storage areas, and bedding dust that can settle quickly. Wool can also trap small particles, making a dust-mite barrier and airtight storage especially important for travel protection.
How should I clean and prep a wool mattress before and after travel to prevent dust mites?
Before travel, vacuum the mattress thoroughly using a HEPA filter and check that it’s fully dry, since moisture can worsen allergen issues and odor. After your trip, re-vacuum the surface and launder any removable covers according to the manufacturer’s instructions, using hot water if the fabric allows. If your wool mattress cover is removable and machine-washable, wash and dry completely, then store the mattress back in its dust-mite–protective cover.
Which travel accessories work best for reducing dust mite exposure with a wool mattress?
Look for dust-mite–proof zippered encasements (often labeled allergen-proof or dust-mite barrier) and airtight storage bags to prevent recontamination while in transit. A HEPA vacuum and a portable lint roller can help remove dust and debris before sealing the mattress. For added hygiene, use clean underlay protection in the sleeping area and keep the mattress elevated off the floor when possible.
📅 Last Updated: October 26, 2026 | Topic: How to Protect a Wool Mattress from Dust Mites During Travel | Content verified for accuracy and freshness.
References
- House dust mite
- Dust mite allergy
- https://www.epa.gov/indoor-air-quality-iaq/dust-mites
- The page you’re looking for isn’t available | NIAID: National Institute of Allergy and Infectious…
- https://medlineplus.gov/dustmiteallergy.html
- https://pubmed.ncbi.nlm.nih.gov/?term=dust+mite+mattress+encasement+control+measures
- https://scholar.google.com/scholar?q=protect+sleeping+area+from+dust+mites+during+travel+mattress+encasement Google Scholar
- https://scholar.google.com/scholar?q=house+dust+mite+allergen+reduction+encasements+washing+hot+water Google Scholar
- https://scholar.google.com/scholar?q=wool+material+dust+mite+infestation+control+encasements Google Scholar