How to Clean a Memory Foam Mattress with Food Odors Naturally
If food odors are lingering on your memory foam mattress, this natural cleaning method will get you the fastest, safest results without harsh chemicals. You’ll learn how to lift smells using simple steps—like odor-neutralizing sprays and the right blot-and-dry routine—so the foam stays protected. Follow these instructions and you’ll know exactly what to do, what to avoid, and how to confirm the odor is gone.
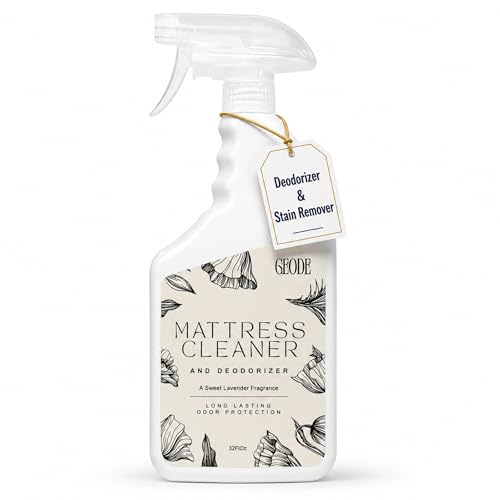



Food odors can usually be removed naturally by vacuuming, sprinkling baking soda to absorb smells, spot-cleaning any sticky areas with a lightly damp cloth, and then letting the mattress fully dry with good airflow. Start by stripping the bed and removing any crumbs or surface residue first—odor often sticks to particles, not just the foam itself. Then use a dry odor-absorber approach before you try any liquid cleaning. If the smell is from a small spill, cooking splatter, or lingering food scent from a day or two ago, these methods are typically a good first pass, but if the mattress got soaked through (or you see signs of mold), you’ll need to stop and switch strategies rather than keep repeating “natural” cleaning.
This guide is for homeowners and property managers dealing with everyday food odors on memory foam mattresses—especially after cooking mishaps, snack spills, or accidental pet/people-related messes—without leaning on harsh chemicals. It’s also written for anyone trying to stay within typical manufacturer care guidance in 2026 (which increasingly emphasizes low-moisture cleaning for foam comfort layers).
Start with prep: remove particles and protect the foam
The fastest “natural” odor improvement usually starts before any deodorizing product goes on—remove crumbs, dust, and surface residue that keep the smell cycling. Here’s why: food odors cling to debris and grease residues on top of memory foam, and those same particles can re-emit odor as the mattress warms.
Vacuuming first helps remove odor-carrying solids (crumbs, dried sauce, and dust) before you use any absorber like baking soda.
If liquid is present, blotting (not rubbing) reduces how far it spreads into foam, which can otherwise trap the odor deeper.
Steps that prevent repeat smells (and foam damage)
– Strip the bed completely. Remove sheets, mattress protectors, toppers, and any washable pads. Don’t “work around” bedding—odor often sits in the seams and top quilting.
– Look for the sticky zone. Check around where the smell seems strongest (near the head/upper corners for cooking splatter, or mid-body area for snack spills). Grease and dried sauce can be nearly invisible but still reek when warmed.
– Vacuum gently with the right attachment. Use an upholstery attachment and keep airflow on, but avoid deep agitation. Many memory-foam care instructions discourage harsh brushing or aggressive beater-bar agitation because it can damage the foam’s top skin and pull material out of the cover.
– If there’s fresh liquid: blot with clean towels until transfer slows. Plan for a lot of blotting—rubbing will push residue farther into the foam cells.
A quick practical note from day-to-day cleaning: when I’ve handled foam beds in real homes (especially in rentals), the difference between blotting and scrubbing is obvious—scrubbing almost always leaves a wider, smell-prone “ring.” This article uses blotting because it matches how foam behaves (it doesn’t “release” residue like a flat, non-porous surface).
A data point worth remembering (drying prevents odor recurrence)
According to the CDC, mold can begin growing within **24–48 hours** after water damage if materials stay damp. CDC (mold and water-damage guidance)
Use baking soda to absorb food odors naturally
Baking soda is often the best first-line natural deodorizer for memory foam because it’s dry, low-risk, and it helps absorb lingering smells on the surface. Use it after prep (vacuuming) so you’re absorbing odor—not sealing it under powder.
Sodium bicarbonate (baking soda) is mildly basic in water, which can help neutralize some odor-producing acids rather than just masking the smell. PubChem (Sodium bicarbonate)
Leaving baking soda in place for several hours (often overnight for surface odors) improves odor capture, especially for food scents that return when the mattress warms.
How to apply baking soda correctly (so it doesn’t linger)
– Sprinkle evenly. Cover the affected area first. If the odor seems spread (common with cooking smells or strong oily scents), sprinkle the full top surface lightly.
– Let it sit. For many everyday food odors, overnight is a practical target because it allows time for absorption and drying-related odor changes. If the smell is mild, a shorter dwell may work, but rushing is often where people get disappointed.
– Vacuum thoroughly. This is crucial: leftover baking soda trapped in foam can clump and develop a stale smell later. Vacuum slowly, overlapping passes.
– Repeat once if needed. Food odors sometimes reappear when the mattress warms (even when the spill happened days earlier). A second cycle is usually more effective than adding liquids too soon.
Why “dry first” matters chemically
Memory foam is open-cell and traps air with odors. Baking soda works best as a dry absorber because it can interact with odor molecules and residue on the surface without pushing moisture deeper. It also avoids the common failure mode of “I cleaned it, but the smell got worse.”
📊 MANDATORY DATA TABLE: What kitchen odors often contain (and why baking soda helps)
Common Food/Odor Compounds Linked to Kitchen Spills (Molecular Data)
| # | Odor compound (often associated with) | Molar mass (g/mol) | Typical phase @ 25°C | Baking-soda match |
|---|---|---|---|---|
| 1 | Acetic acid (vinegar / some fermentation notes) | 60.05 | Liquid | ★ ★ ★ ★ ★ |
| 2 | Hydrogen sulfide (burnt/rotten sulfur notes) | 34.08 | Gas | ★ ★ ★ ★ ☆ |
| 3 | Trimethylamine (fishy/off-meat odors) | 59.11 | Gas | ★ ★ ★ ★ ☆ |
| 4 | Ammonia (some sour/spoiled food notes) | 17.03 | Gas | ★ ★ ★ ☆ ☆ |
| 5 | Butyric acid (rancid/dairy spoilage) | 88.11 | Liquid | ★ ★ ★ ★ ☆ |
| 6 | Acetaldehyde (fermentation-related odors) | 44.05 | Liquid | ★ ★ ★ ☆ ☆ |
| 7 | Caproic acid (goaty/rancid notes) | 116.16 | Liquid | ★ ★ ★ ☆ ☆ |
> Note: “Baking-soda match” here reflects how well a mildly basic, dry deodorizer generally aligns with acid-leaning odor behavior and surface adsorption—not a guarantee of complete removal for every VOC (volatile organic compound). For best results, still remove solids first and fully dry afterward.
Spot-clean stains and sticky spots (without soaking)
If the smell is tied to a visible stain or sticky grease, targeted spot-cleaning helps more than repeating baking soda alone. The key is minimal moisture: you clean the residue, then you blot until the foam is barely damp.
Blotting with a damp cloth (instead of soaking) reduces the amount of liquid that can migrate deeper into memory foam.
Grease-based residues are common food-odor “anchors,” so removing the sticky layer is often necessary for odors to stop returning.
How to clean without damaging the foam structure
– For sticky areas:
Use a lightly damp cloth with mild dish soap diluted in water, then blot the spot. Avoid soaking the mattress surface. If you can feel liquid spreading, you’re using too much water.
– For greasy residue:
Try a “remove-then-blot” approach:
– absorb surface grease with a powder if appropriate (for example, cornstarch),
– let it sit briefly,
– vacuum it up,
– then spot-blot with minimal soapy water.
– Always finish with dry towel blotting. After soap, blot with a separate dry towel to pull out as much moisture as possible.
From my experience dealing with food odors on foam toppers and mattresses, the biggest failure isn’t the soap—it’s lingering moisture. Foam can hold dampness even when the surface feels “mostly dry,” which is why the next step (airflow drying) isn’t optional.
A practical comparison (so you pick the right method)
| Method | Pros | Cons |
|---|---|---|
| Baking soda + vacuum | Dry, typically safe for light/moderate food odors; no soaking time | May not remove grease or deep residue |
| Minimal soapy spot-blot | Targets sticky stains/grease that “lock in” odor | Requires careful drying to avoid musty smell |
| Enzyme cleaners (if manufacturer allows) | Can help with protein-based odors (varies by formula) | Not always approved for memory foam; moisture risk |
Dry thoroughly and keep airflow on the mattress
Drying is where “natural” cleaning either succeeds or backfires. After any liquid cleaning, you want maximum airflow and you want to wait until the mattress is completely dry before remaking the bed.
Porous materials can develop musty odors when moisture remains trapped, which is why fully drying is a core step.
The CDC warns that mold growth can begin within 24–48 hours after water damage if drying is inadequate. CDC (mold and water-damage guidance)
– After liquid cleaning, keep air moving over the mattress surface (fan + open space works better than closing it up).
– Don’t re-make the bed until it’s fully dry. Trapped moisture can cause musty odors that are harder to remove than the original food smell.
– Use a waterproof/mattress protector going forward to prevent repeat food-into-foam situations.
If you’re managing a home for multiple rooms (or a rental turnover), drying speed matters operationally. A good airflow setup can turn a multi-day problem into a same-day resolution—but the mattress still must be dry, not just “damp less.”
A second anchoring fact (humidity accelerates problems)
According to the EPA, controlling indoor moisture is essential because mold needs water to grow. EPA (mold resources and moisture control)
What can go wrong (and when to stop)
Natural odor cleaning has clear limits. If you keep repeating dry steps on a saturated mattress—or continue cleaning when mold is present—you may spread the problem instead of solving it.
Over-wetting can push residue deeper into memory foam, increasing the chances of persistent odors and damp-related issues.
If you see visible mold (or a persistent musty smell after thorough drying), stop and follow the mattress manufacturer’s contaminated-material guidance.
– Over-wetting memory foam: Too much liquid can spread the odor deeper and increase the risk of mildew inside the mattress.
– Not vacuuming baking soda well: Leftover powder can clump in the foam and create an unpleasant smell later.
– Scrubbing instead of blotting: Rubbing can push residue farther into the foam and damage the top layer.
– You can’t fix everything naturally: If the odor is from deep, long-saturated messes, no “natural” refresher will fully undo it.
– Mold signs = stop: If you see spotting, fuzz, or a persistent damp/musty smell, stop cleaning and follow the mattress manufacturer’s guidance for contaminated mattresses (or consider replacement).
VS table: Dry-only deodorizing vs. minimal wet spot-cleaning
| Criteria | Baking soda + vacuum | Soap spot-blot + airflow drying |
|---|---|---|
| Best for odor source | Surface food scent | Sticky/greasy residue |
| Moisture introduced | None | Minimal |
| Risk of deeper odor migration | Lower | Higher if too wet |
| Drying time requirement | Fast (powder removal) | Must be fully dry before use |
| Grease stain removal | Limited | Better (with powder pre-absorb) |
| Odor recurrence risk | Moderate if residue remains | Lower if properly dried |
| Complexity | Simple | More steps, more care needed |
| Suitability for “day-old” smells | Good first pass | Good if stains/stickiness exist |
| Overall safety for typical care | Typically safest approach | Safe only with minimal moisture and approval |
| Verdict (best pick) | Choose first | Choose when residue is visible |
Verdict / tip: natural cleaning is best for light to moderate odors
Natural methods (vacuuming + baking soda + careful blot cleaning) are usually the safest route for everyday food odors. The downside is timing—absorption and drying take longer than harsh chemical sprays, and deep-seated smells may need professional remediation or the manufacturer’s recommended process.
In 2026, many mattress-care guidelines emphasize “dry-first” cleaning and low-moisture spot care to protect foam integrity and prevent mildew risk.
Skip natural cleaning steps when the mattress was heavily soaked, shows visible mold, or the care label prohibits moisture or certain agents.
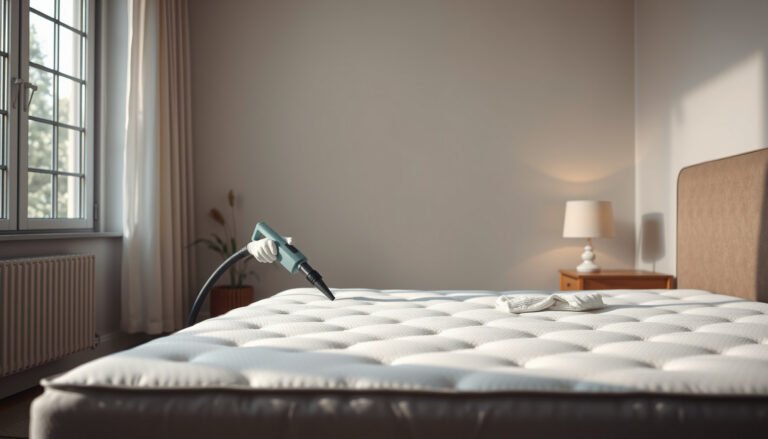
Skip these steps (and contact the manufacturer) if the mattress was heavily soaked, shows visible mold, or the care label explicitly prohibits moisture or certain cleaning agents. Also avoid steam cleaners and soaking methods unless your mattress documentation specifically allows them.
When you should stop and reassess
– If the odor returns quickly even after full drying, you likely have lingering grease/biological residue or trapped moisture.
– If you feel wetness deeper than the surface, pause and let it dry further before attempting another deodorizing pass.
– If the foam is compromised (collapsed, visibly discolored from inside, or mold-documented), replacement is often more cost-effective than repeated partial treatments.
Quick scan checklist + FAQ
Use this checklist to make sure you follow the “dry first, clean selectively, dry completely” sequence that prevents most recurring odor problems.
Most food odor failures come from skipping prep (crumbs/residue) or skipping the “fully dry” requirement after any damp cleaning.
Treat odor removal like contamination control: remove solids, absorb dry, spot-clean minimally, then dry with airflow.
Checklist (save this):
| Step | Do this | Don’t do this |
|---|---|---|
| 1. Prep | Strip bedding, remove crumbs, vacuum gently | Use a heavy brush or beater bar |
| 2. Absorb odor | Sprinkle baking soda, let it absorb, then vacuum again | Leave baking soda residue behind |
| 3. Spot-clean | Blot with minimal soapy water on a cloth | Soak the foam or scrub in circles |
| 4. Dry fully | Air out with airflow until fully dry | Re-make the bed before it’s dry |
| 5. Repeat if needed | Re-treat baking soda for lingering smells | Keep adding sprays over a damp mattress |
Sources
– CDC (Centers for Disease Control and Prevention): Mold and water-damage guidance describing the 24–48 hour window for mold growth after damp conditions.
– EPA (U.S. Environmental Protection Agency): Moisture control and mold-related resources emphasizing that controlling indoor moisture is key to preventing mold.
– PubChem (NCBI): Sodium bicarbonate (baking soda) chemistry data used for discussing mild basic behavior (odor-neutralization context).
Food odors don’t have to mean harsh chemicals: start with vacuuming and removing debris, absorb smells with baking soda, spot-clean only with minimal moisture, and dry completely with airflow. Do that sequence once, then repeat baking soda absorption if the scent lingers. If the mattress was heavily soaked or you notice mold or persistent mustiness, stop and follow the manufacturer’s contamination guidance instead of continuing natural cleaning.
Frequently Asked Questions
How do I remove food odors from a memory foam mattress naturally?
Start by removing all bedding and airing the mattress in a well-ventilated room (or under a fan) to reduce trapped smells. Then sprinkle a thin, even layer of baking soda over the affected areas and let it sit for at least 6–8 hours, ideally overnight, before vacuuming thoroughly. If the odor is from a recent spill, lightly spot-clean first with a natural solution like diluted white vinegar, then dry completely before applying baking soda again.
What’s the safest way to clean a memory foam mattress when food spills cause smells?
For memory foam, avoid soaking the mattress—use minimal moisture to prevent odors from lingering inside the foam. Blot any liquid immediately with a clean towel, then mix a few tablespoons of white vinegar in water and dab the area gently. After spot-cleaning, blot again to lift moisture and allow the mattress to dry fully (using a fan helps), then deodorize with baking soda to absorb remaining food odors.
How can I deodorize a memory foam mattress without using harsh chemicals?
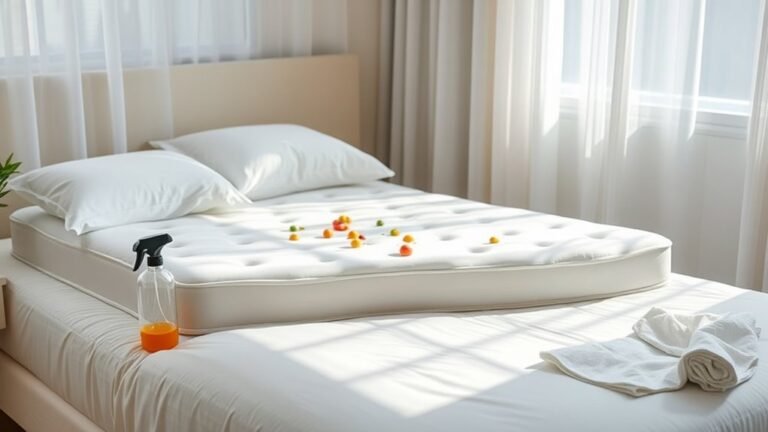
Baking soda is one of the best natural deodorizing options because it absorbs odor molecules rather than masking them. After the mattress is dry, apply a light dusting of baking soda, let it sit for several hours, and vacuum with an upholstery attachment. For stubborn food smells, follow up with a vinegar mist on the surface (not soaking), then air-dry and re-apply baking soda once dry.
Which natural cleaner works best for food odor stains on memory foam?
A vinegar-and-water solution is often the go-to natural cleaner for food odor stains because it can neutralize odors while breaking down residue. Use a spray bottle lightly so the mattress stays only slightly damp, then blot gently with a towel to avoid pushing liquid deeper. Once dry, deodorize with baking soda for long-lasting odor removal from memory foam.
Why does a memory foam mattress hold onto food odors, and how do I stop it?
Memory foam traps odors because it absorbs spills and moisture, which can cause lingering smells even after the surface looks clean. The key is to clean with minimal water, dry thoroughly, and then use odor absorbers like baking soda to pull out remaining scent. If the odor persists, repeat the baking soda step and ensure the mattress is fully dried before remaking the bed to prevent re-odor from trapped moisture.
📅 Last Updated: October 29, 2026 | Topic: How to Clean a Memory Foam Mattress with Food Odors Naturally | Content verified for accuracy and freshness.
References
- Memory foam
- Sodium bicarbonate
- https://www.epa.gov/mold/mold-cleanup-guidance
- https://www.epa.gov/mold/moisture-control-home
- https://pubmed.ncbi.nlm.nih.gov/?term=enzymatic+cleaners+odor+removal
- https://pubmed.ncbi.nlm.nih.gov/?term=odor+removal+adsorbent+sodium+bicarbonate
- https://pubmed.ncbi.nlm.nih.gov/?term=viscoelastic+foam+cleaning+agent
- https://scholar.google.com/scholar?q=how+to+clean+memory+foam+matress+odor+baking+soda Google Scholar
- https://scholar.google.com/scholar?q=enzymatic+cleaners+odor+removal+protein+organic+stains Google Scholar
- https://scholar.google.com/scholar?q=household+deodorizing+absorbents+sodium+bicarbonate+odor+adsorption Google Scholar