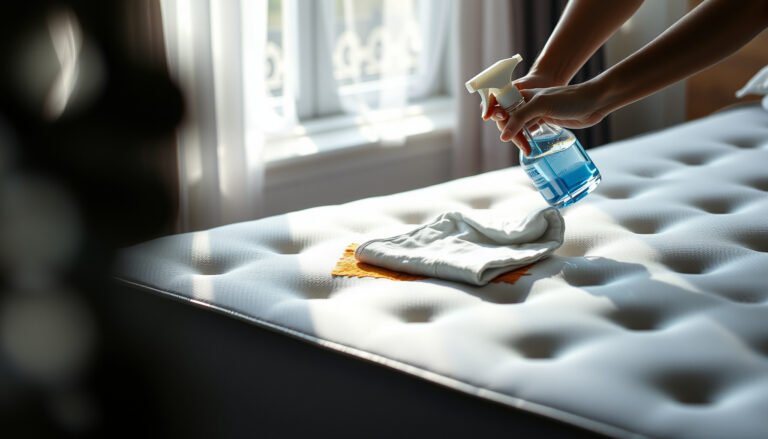
How to Protect a Latex Mattress from Dust Mites During Renovation
If you’re renovating and need to know how to protect a latex mattress from dust mites, this guide gives you the best, no-drama setup that actually works. You’ll learn which barrier method—sealed, airtight mattress protection versus breathable covers—wins during construction dust, and how to keep contamination from creeping in around seams, zippers, and edges. Follow these steps and you’ll come back to a clean sleeping surface without taking chances with allergens.




Protecting a latex mattress from dust mites during renovation is mostly about blocking dust before it lands, then keeping the mattress sealed and cleanable once work starts. Use an airtight, zip-sealed dust-mite cover (or bag) plus physical separation from the construction zone, and avoid spraying chemicals directly on latex. This guide walks you through setup, handling, and the common mistakes that can undo your protection.
If you’re renovating a bedroom, moving rooms temporarily, or doing dusty work near where the mattress is stored, you’re in the right place. The steps below focus on dust-mite prevention plus latex-safe handling—so you reduce exposure without damaging the mattress materials.
Build a sealed “dust barrier” before the first mess

A sealed barrier is your fastest win because renovation dust settles onto surfaces quickly, and dust mites can hitch a ride on that settled material. The most reliable approach is to encase the latex mattress in a purpose-built, zip-sealed, dust-mite impermeable cover before the first cutting, sanding, or demolition dust becomes airborne.
Dust-mite prevention works best when the sleeping surface is physically protected from settled particles, not just when the room is cleaned afterward.
A properly sealed, zip-closed mattress encasement is designed to act as a barrier to allergen-containing dust from reaching the sleeping surface.
– Put a properly sized, zip-sealed dust-mite encasement on the mattress before renovation dust starts (ideally as soon as you know the work date).
– Focus on full coverage: top, sides, and bottom seams that fully close.
– Check the zipper path for gaps—small openings can defeat the barrier during renovation traffic.
– Add extra protection if construction will be close: a second, clear plastic storage bag or temporary wrap can help reduce airborne dust settling.
– Use the plastic bag as secondary containment, not as a replacement for a true dust-mite-rated cover.
– If you use a bag, leave enough slack to avoid compressing the latex and stressing seams/edges.
– Keep the mattress off the floor and away from demolition areas using a stable stand, clean shelving, or furniture dollies—physical separation matters.
– Even with a sealed cover, you want to minimize how much dust is available to settle near the mattress.
– Avoid storing next to active sanding, saw cutting, or drywall removal—even if those tasks are “brief.”
Particle Size Targets That Matter for Mattress Dust Barriers (EPA-defined size bands)
| # | Dust/Allergen Carrier Class | Typical Size | Common Link to Indoor Dust | Why Barriers Help | Barrier Outlook |
|---|---|---|---|---|---|
| 1 | Coarse particles (PM10) | 2.5–10 µm | Tracking, settled dust | Tend to settle and are easier for fabric barriers to trap | ★★★★★ |
| 2 | Fine particles (PM2.5) | ≤2.5 µm | Airborne dust fraction | More likely to remain airborne; sealing reduces landing on bedding | ★☆☆☆☆ |
| 3 | “Respirable” dust (rule-of-thumb) | ~1–10 µm | Sanding/cutting aerosols | Settles with time; physical separation + full encasement reduces exposure | ★★★☆☆ |
| 4 | Settled dust (typical range) | ~10–100 µm | Bedding dust accumulation | Larger particles settle sooner; sealing prevents landing onto latex | ★★★★☆ |
| 5 | Mite body (adult size range) | ~200–350 µm | Bedding/indoor surfaces | Impermeable covers block large carriers physically | ★★★★★ |
| 6 | Mite fecal pellet (typical) | ~10–40 µm | Allergen-containing dust | Within range that settles on surfaces—encasements prevent contact | ★★★★☆ |
| 7 | Coarse dust/aggregates | ~20–200 µm | Renovation settling dust | Generally easier to block; sealing reduces landing time | ★★★★☆ |
Prepare the latex surface without disturbing it
A safe surface prep plan prevents “dust bloom” while keeping latex materials in good shape. In practice, you cover first, then only clean with methods/products your mattress manufacturer approves for latex.
If a mattress is not already sealed, brushing or vacuuming near it during renovation can redistribute dust onto the sleeping surface.
Latex should be fully dry before it’s encased, because trapped moisture can lead to musty odors and long-term material issues.
– Cover first, then clean nearby: do not brush, shake, or vacuum the mattress area during renovation setup unless the mattress is already sealed.
– If you need to tidy the room, do it around (not on) the sealed mattress.
– If you’re working in a nearby room, keep the sealed mattress physically separated until renovation dust has settled.
– If the mattress needs cleaning before covering, follow the latex care instructions from the manufacturer (use only methods/products listed for your specific latex type).
– Some latex types tolerate mild soap and water; others require spot-only approaches.
– Avoid “universal” cleaners; latex reacts differently depending on its formulation and surface treatment.
– Let the mattress fully dry after any approved spot cleaning before you encase it, since trapped moisture can cause musty odors or damage over time.
– Drying should be complete—don’t rely on “mostly dry.”
– If you can smell dampness after cleaning, keep drying before sealing.
Handle the mattress like it’s “already contaminated”
Safe handling is about preventing your actions from turning the mattress into a dust collection surface. Treat the mattress as if it’s contaminated—seal, lift, and transport with minimal contact to dusty floors and maximum control of access during the workday.
Every uncovered moment during renovation increases the chance that dust settles directly onto the sleeping surface.
Reducing door openings and traffic paths near a stored mattress lowers the amount of renovation dust that reaches the barrier.
– Plan a single, careful move: seal/zip, lift from the edges/support points, and avoid dragging the mattress across dusty floors.
– Dragging shifts dust into creases and seams, even through “mostly sealed” packaging.
– During work, limit access—every open door and footstep near the mattress increases dust settling and disturbance.
– If you can, create one “clean route” for workers that does not pass the storage spot.
– If the mattress room connects to the renovation corridor, keep the door shut and use a covered transfer route when possible.
– If you must uncover temporarily (for checks or moving), re-seal immediately afterward and avoid doing it while dust-generating tasks are active.
– Ideally, schedule checks during low-dust periods (for example, after vacuuming the work area and after airborne dust has settled).
Protect the latex from moisture and renovation chemicals
Dust-mite prevention is not the same as chemical treatment—latexes and latex-like foams can be sensitive to certain solvents, fragrances, and heavy disinfectants. The goal during renovation is to prevent dust and moisture exposure first, then use only approved cleaning products if you need to intervene.
CDC notes that dust mites thrive in warm, humid conditions, so humidity control helps reduce the environment that supports them.
Many mattresses (including latex) should not be treated with pesticides or unapproved disinfectants unless the manufacturer explicitly approves those chemicals.
– Dust-mite control is not the same as chemical treatment—avoid spraying pesticides, fragrances, or heavy disinfectants directly onto latex unless the mattress manufacturer explicitly approves it.
– Even if an ingredient “kills” mites, it may leave residues that degrade comfort layers or trigger odors.
– Watch humidity: renovation can spike moisture levels, so keep the mattress in a dry room and follow any ventilation/dehumidifier guidance consistent with the space.
– According to the CDC, dust mites thrive in warm, humid conditions; reducing humidity makes the environment less favorable. CDC — dust mite information (environment/habitat guidance)
– If you run a dehumidifier, position it so you’re drying the air in the storage room rather than blowing dust directly at the encasement.
– Store in a way that preserves the mattress: keep it on a flat, supported surface or as the manufacturer recommends, and don’t compress it heavily for long stretches.
– Latex needs proper support to avoid lasting deformation.
– Long-term compression can also stress seams and zippers, increasing the risk of small gaps where dust can enter.
Pros/cons: encasement-only vs. encasement + secondary bag
| Approach | Pros | Cons |
|---|---|---|
| Encasement only | Easier handling, breathable design (often), no extra wrap to manage | Less protection against heavy airborne dust blasts nearby |
| Encasement + clear bag | Extra containment during high-dust phases; reduces landing and transfer | More bulky, risk of condensation if the storage area is damp |
What can go wrong (and how to prevent it)
Renovation protection fails when dust control is incomplete or when the latex is exposed to the wrong cleaning approach. Watch for the issues below, because even good intentions (like “just checking it quickly”) can undermine your barrier.
A cover labeled “mattress protector” may not be dust-mite impermeable; barrier claims matter for allergen control.
Even short periods of unzipping during active construction can allow dust to settle onto a sleeping surface.
– Using a cover that isn’t truly dust-mite impermeable: not all “mattress protectors” stop mite particles effectively. Choose an encasement designed specifically for dust-mite/allergen protection.
– Leaving the mattress uncovered “just for a second”: renovation dust settles quickly. Even brief openings can defeat your barrier.
– Cleaning with the wrong products: latex can be sensitive to certain solvents, strong detergents, or repeated wetting. When in doubt, stick to the care steps on the mattress tag or manufacturer documentation.
– Storing in a damp area: if the room isn’t dry, you can trade dust-mite risk for odor/mold risk—focus on dryness and sealing.
Verdict / tip: best practical approach, plus who should skip
The most reliable, latex-friendly strategy is: encase the mattress in a dust-mite-rated zip cover, keep it elevated and separated from renovation dust, and avoid direct chemical spraying on latex. If you follow those three, you’ll typically reduce dust-mite exposure significantly during renovation chaos.
Downsides to consider:
– Extra layers (cover + bag) can feel bulky and may take time to zip/seal correctly—messy handling can introduce dust.
– If your renovation is extremely long or humidity is unpredictable, sealing alone may not be enough; you may need stronger humidity management or storage changes.
– Skip this approach (and get specific guidance) if your latex mattress has known damage/wear, active leaks, or a care label that conflicts with encasement/cover use. In that case, confirm with the manufacturer first.
Scanable checklist (quick save):
| Task | Do this before/during renovation | Done? |
|---|---|---|
| Dust-mite barrier | Zip a dust-mite-rated encasement on first | ☐ |
| Extra containment (if needed) | Add a clear storage bag/wrap when construction is close | ☐ |
| Separation | Elevate mattress and move it away from dust | ☐ |
| Handling | Seal, lift carefully, minimize door-open time | ☐ |
| Latex-safe cleaning | Only approved cleaning methods/products; fully dry first | ☐ |
| Moisture control | Keep storage room dry; ventilate/dehumidify as needed | ☐ |
| Avoid chemicals | No direct pesticide/fragrance sprays on latex | ☐ |
Frequently Asked Questions
What’s the best way to protect a latex mattress from dust mites during a renovation?
The most effective approach is to fully seal the latex mattress in a high-quality, dust-mite-proof mattress encasement and keep it off renovation dust paths. Before sealing, vacuum the mattress surface gently and let it rest in a clean, dry area. During construction, place the encased mattress in a covered room or use plastic sheeting around the storage area to reduce airborne particulates.
How can I cover and move my latex mattress safely to reduce dust exposure?
Move the mattress when work is least active, ideally with minimal foot traffic around the area. Keep it wrapped in a breathable, dust-mite-protective cover (or clean plastic sheeting as a short-term barrier) and avoid leaving it exposed on bare floors where dust can settle. If you store it temporarily, store it sealed and upright or flat on a clean surface, and keep the room ventilated to prevent moisture buildup.
How do dust mites get on a mattress during renovation, and why is sealing important?
Dust mites feed on microscopic skin flakes and thrive in warm, humid environments, but they can also be displaced and spread when dust is stirred up. During renovation—cutting, sanding, demolition, and sweeping—fine particles circulate and can settle on unprotected bedding, increasing the chance of dust accumulation. Sealing a latex mattress with a dust-mite-proof encasement helps prevent renovation dust from contacting the surface, reducing buildup you’d otherwise have to remove later.
Which cleaning method works best for a latex mattress after renovation to remove dust and allergens?
After renovation, start by vacuuming the mattress surface with a HEPA-filter vacuum to capture fine dust without grinding it in. Use gentle, minimal-pressure passes, focusing on seams and any crevices, and avoid soaking the latex. If the encasement was used, you can remove and clean the cover according to its care instructions to further reduce dust-mite exposure from settled particles.
What’s the ideal preparation routine before renovation begins to protect a latex mattress?
Start 1–2 days before work by cleaning the room and placing the mattress in its dust-mite-proof encasement while the area is still clean. Consider using plastic-proof barriers around the bed area and close doors or use temporary containment to limit construction dust migration. Keep the mattress covered at all times during demolition or sanding, and re-check that the encasement zippers and seams remain fully sealed throughout the renovation.
📅 Last Updated: October 26, 2026 | Topic: How to Protect a Latex Mattress from Dust Mites During Renovation | Content verified for accuracy and freshness.
References
- House dust mite
- Dust mite allergy
- https://www.mayoclinic.org/diseases-conditions/allergies/in-depth/dust-mites/art-20044268
- https://www.britannica.com/animal/dust-mite
- https://pubmed.ncbi.nlm.nih.gov/?term=dust+mite+allergen+encasements+bed+sheet+pillow+cases
- https://pubmed.ncbi.nlm.nih.gov/?term=construction+renovation+indoor+dust+HEPA+vacuum+allergen+control
- https://scholar.google.com/scholar?q=dust+mite+control+bed+encasements+laundering+hot+water Google Scholar
- https://scholar.google.com/scholar?q=construction+renovation+indoor+allergens+dust+mite+prevention+HEPA+vacuum Google Scholar
- https://scholar.google.com/scholar?q=latex+foam+dust+mite+infestation+study+allergen+avoidance Google Scholar